Train an Object Detection Model
Follow this guide to learn how to prepare and, if necessary, train an object detection model. Neura offers two ways to train an object detection model: using AI Hub or the AI Development Arena. The latter is significantly faster and more user-friendly. Both use different methods for object detection.
Using the AI Hub - Method: neura_DLIS1 or neura_DLSI3
Here’s how you can train an object detection model, using AI Hub. This tutorial assumes that you have at least one registered dataset, possibly generated using AI Hub: Data Generation.
Note
Find detailed information about the training process and the desricption of training parameter here.
Step 1: Train a model and test
Using an external PC, access Maira GUI at http://192.168.2.14:8080 and switch to AI Hub Mode.
Click .
Select Object Detection as the Type of Training.
Select neura_DLIS1 or neura_DLIS3 as the Method.
Select as many datasets and dataset types from the Dataset list dropdown and it’s corresponding types. Provide a suitable name for the model and define the number of iterations.
Click . The progress bar should gradually fill up.
Once the training is complete, you will see a message indicating that the process has finished.
Successfully trained models can be found under > . Database search allows finding the generated dataset by the assigned name.
Attention
Don’t forget to test your model after training. See Model Testing for more information.
Using the AI Development Arena Object Onboarding Wizard - Method: neura_DLIS2
This tutorial assumes that you have completed the tutorial about collecting real data (Tutorial: Collect Real Data) and saved a dataset with the type OBJECT ONBOARDING.
Hint
What is Object Onboarding Wizard?
As of now, if you capture images using an external camera, you need to do the following to make the images available for Object Onboarding (to train a neura_DLIS2 model).
Ensure the image files are prefixed with rgb_ followed by a digit and with .png, .jpg or .jpeg as extensions. (e.g., rgb_1.jpg)
Store the image files in a folder with a name that matches the object name
Copy the folder into a USB and use the robot’s File Transfer utility to transfer the folder to the AI server location: object_perception/objects/object_templates.
Using an external PC, access Maira GUI at http://192.168.2.14:8080 and switch to AI Hub Mode.
Click AI Dev Arena and a new tab to AI Dev Arena opens.
Click Object Onboarding Wizard to open the wizard. A new tab opens.
Step 1: Generating masks for the new object
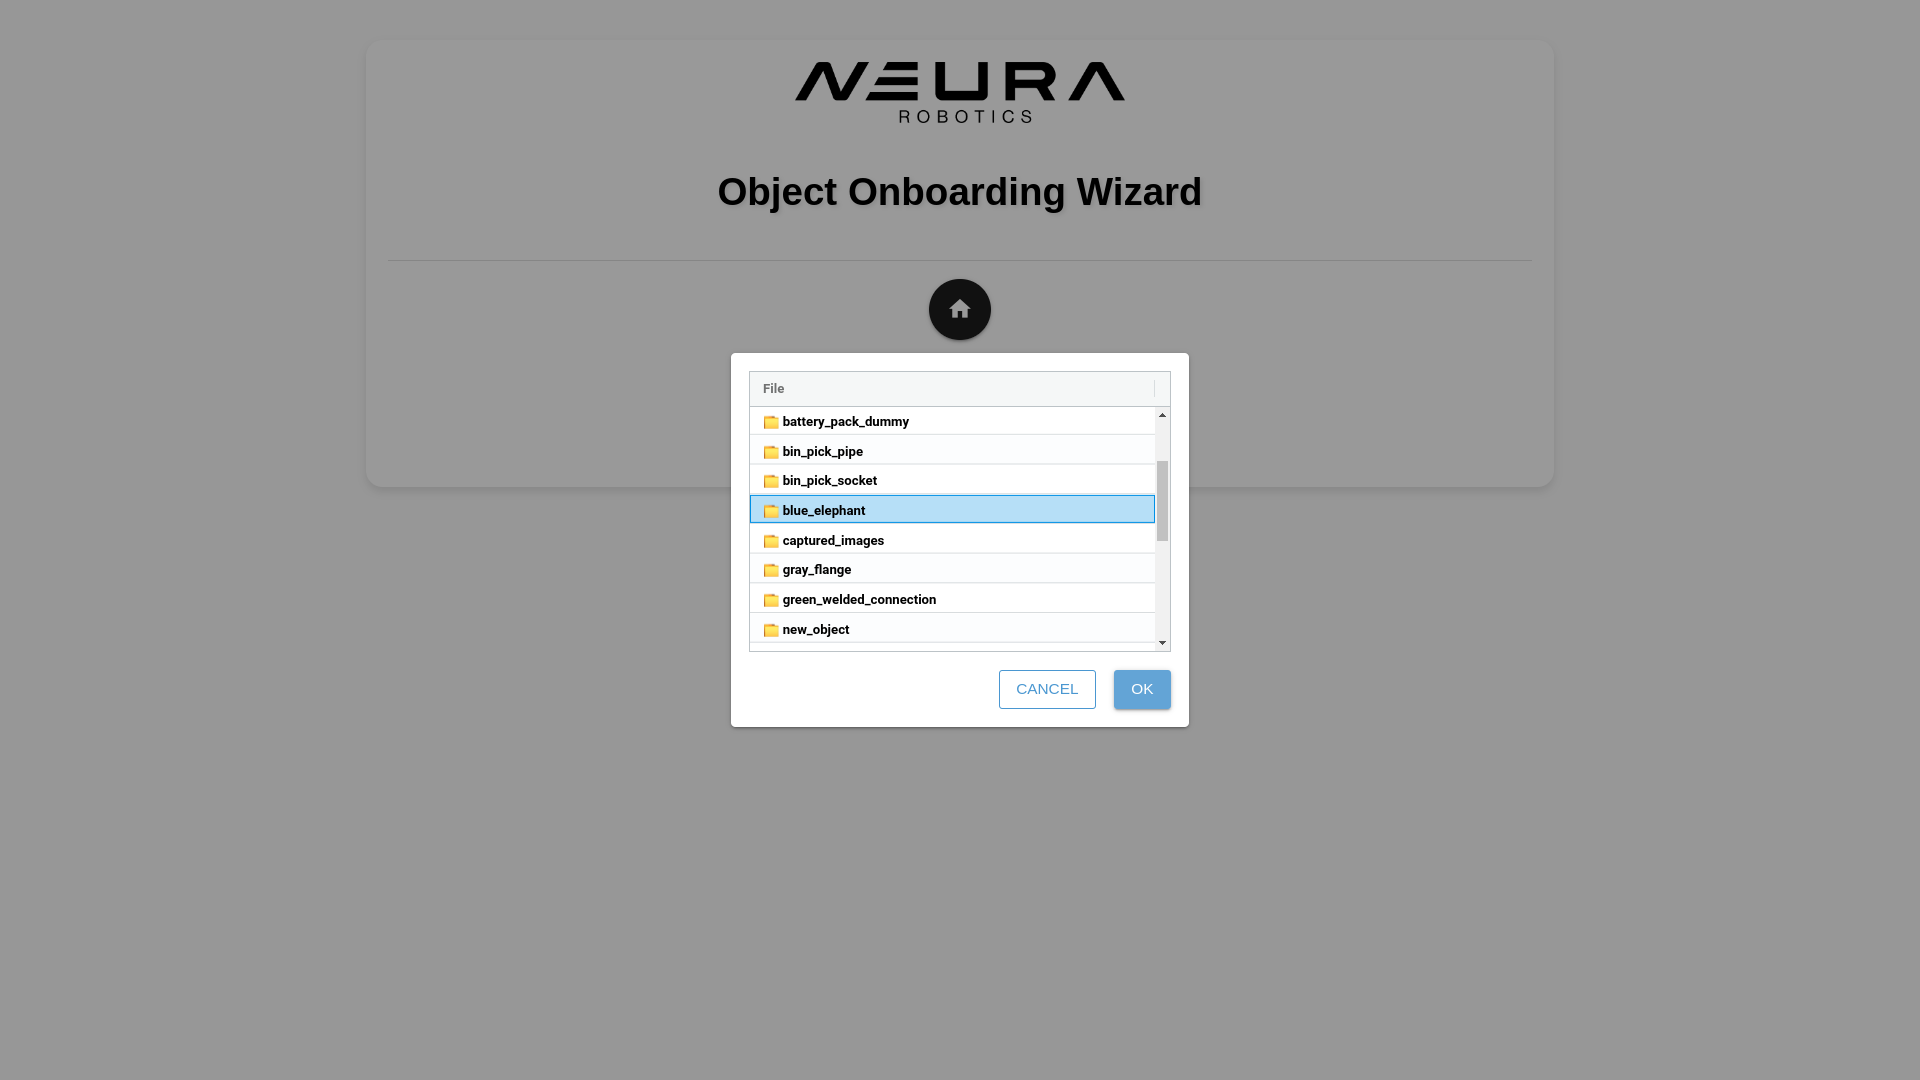
Click Object Onboarding and click Load Images. Navigate into object_templates directory, click the folder that matches the assigned name during saving the dataset. Click OK.
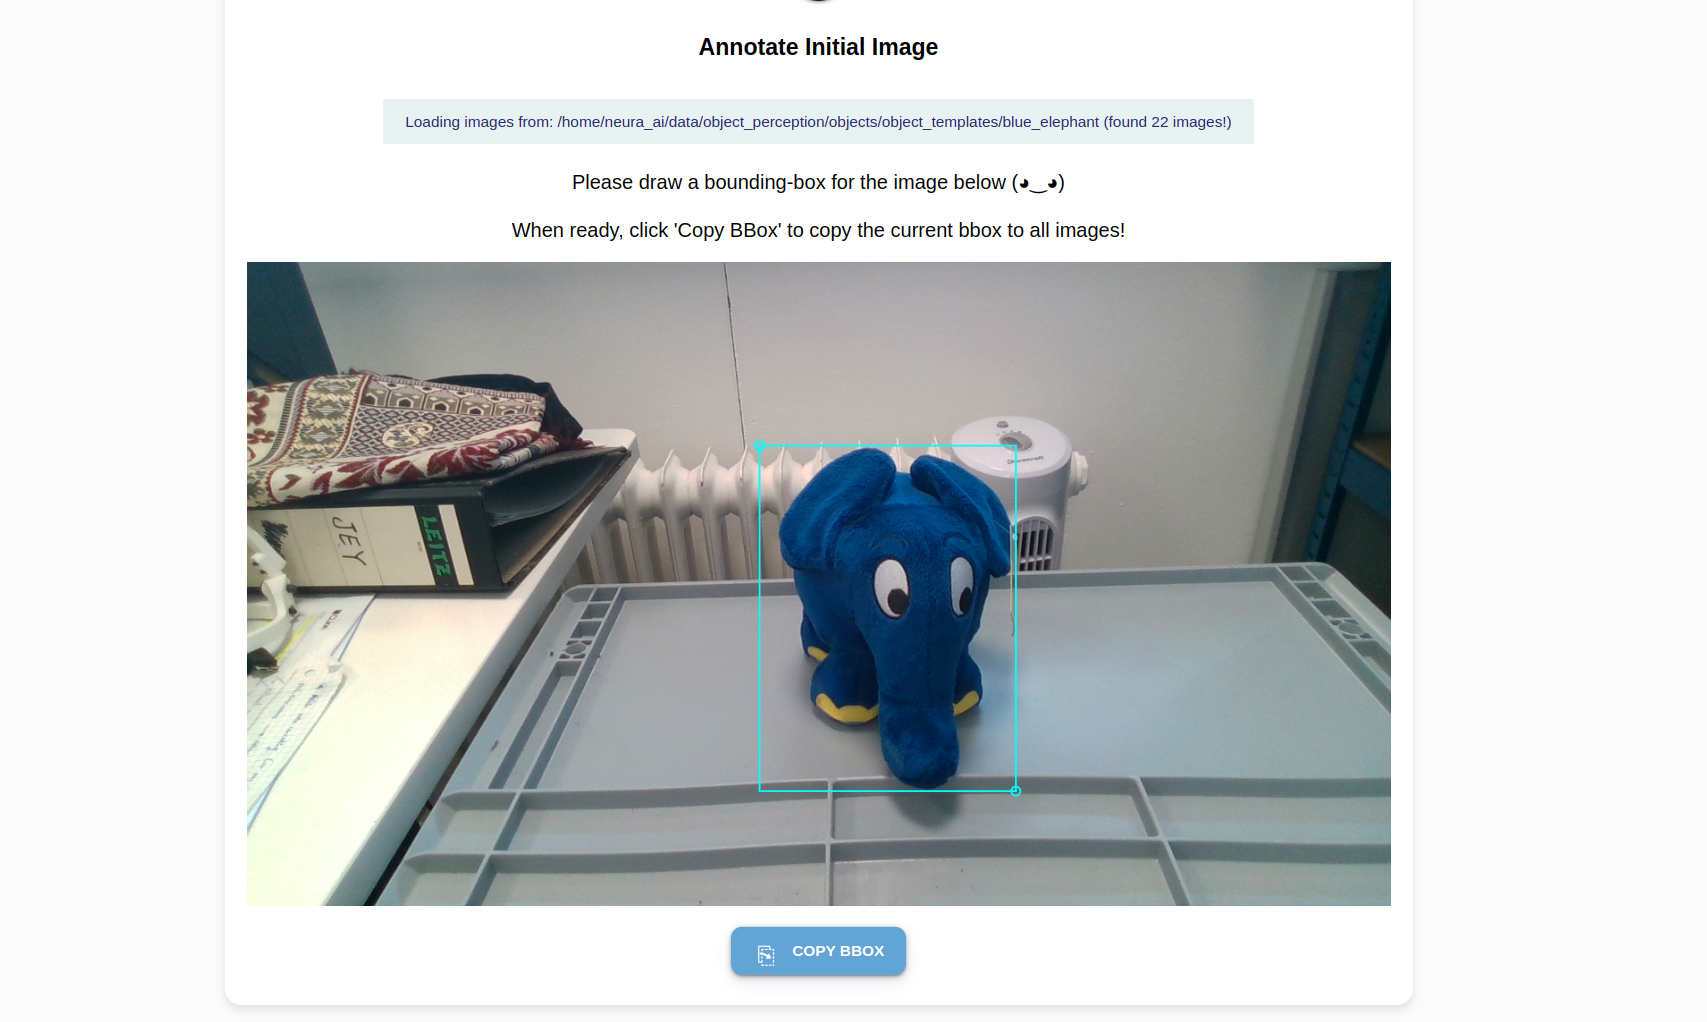
You see your first image and a crosshair arrow. Draw a bounding box around the object:
Position the crosshair in such a way that your object of interest is tightly (tangentially touching) the lower right quadrant. Left-click once.
Position the crosshair in such a way that your object of interest is tightly (tangentially touching) the upper left quadrant. Left-click once. A complete bounding box is formed around the object.
Click Copy Box to apply the relative position of the bounding box to all images.
Click through the images to review the bounding boxes. If an adjustment is needed, simply redraw the box.
Attention
You only need to annotate one object per image. If you have multiple candidates that can be annotated in an image, pick the one that’s least occluded.
Note
The bounding box does not need to be perfectly aligned. The majority of the object should be inside the box, but parts of it can extend beyond the boundary.
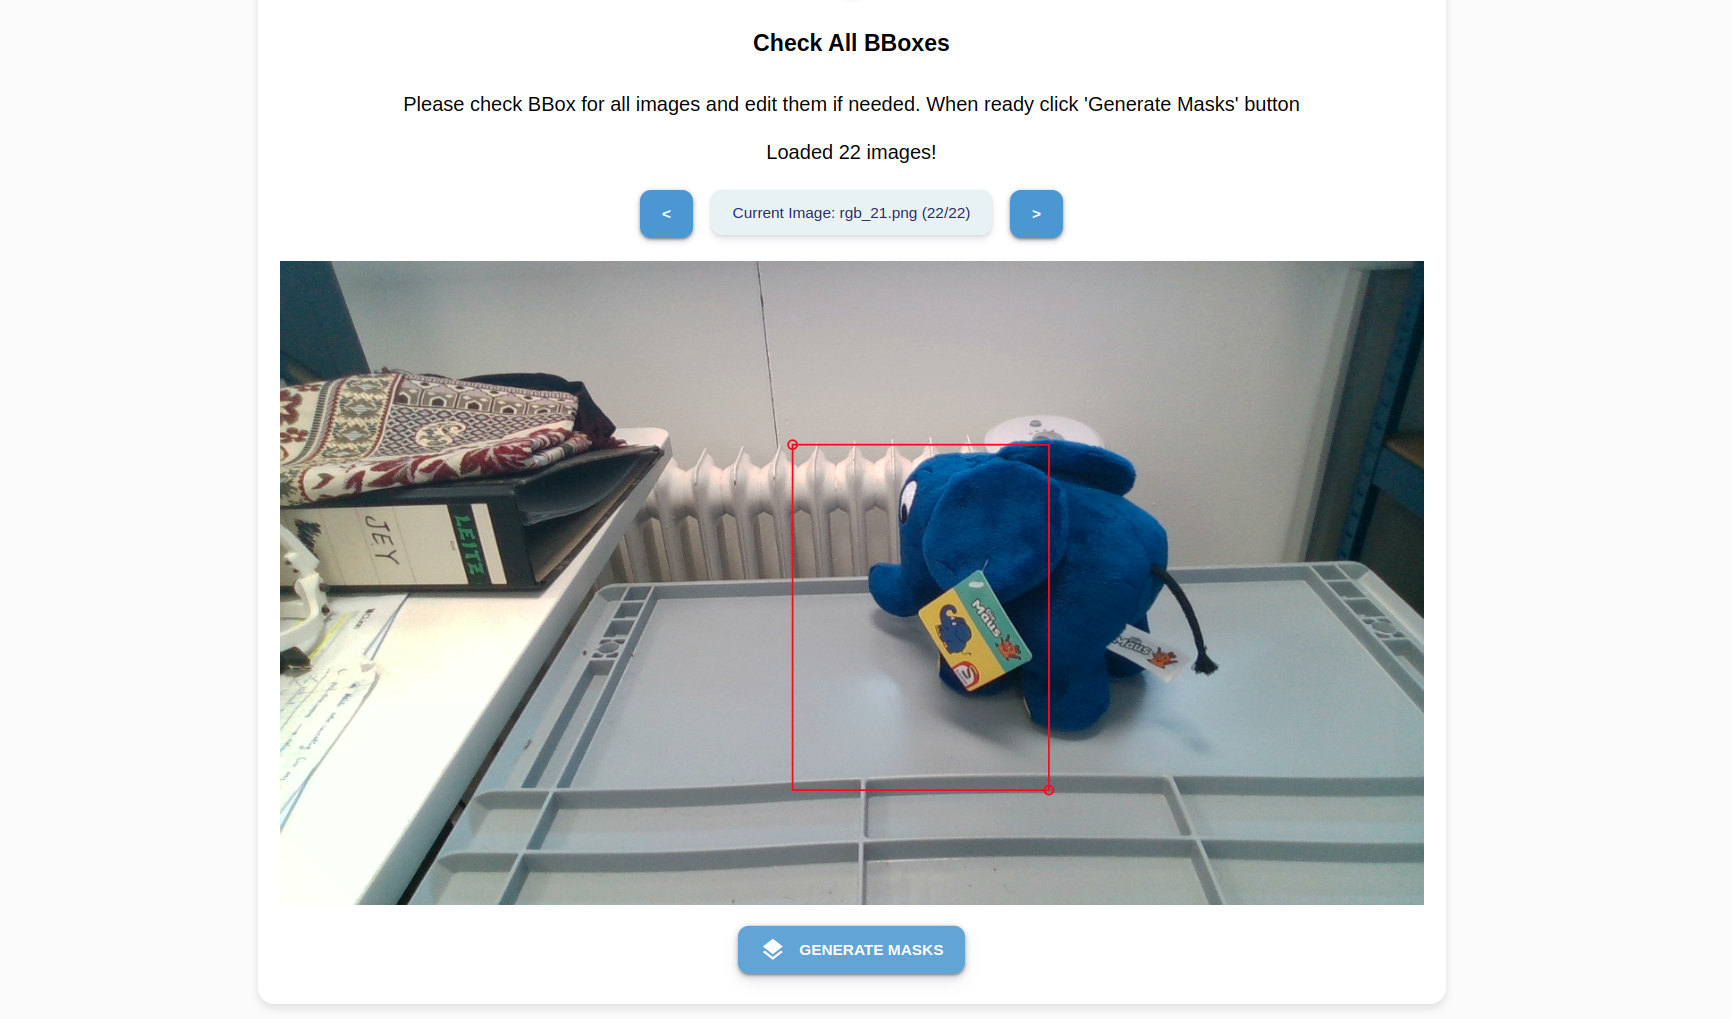
Click Generate Masks to automatically generate red masks around your object’s boundaries.
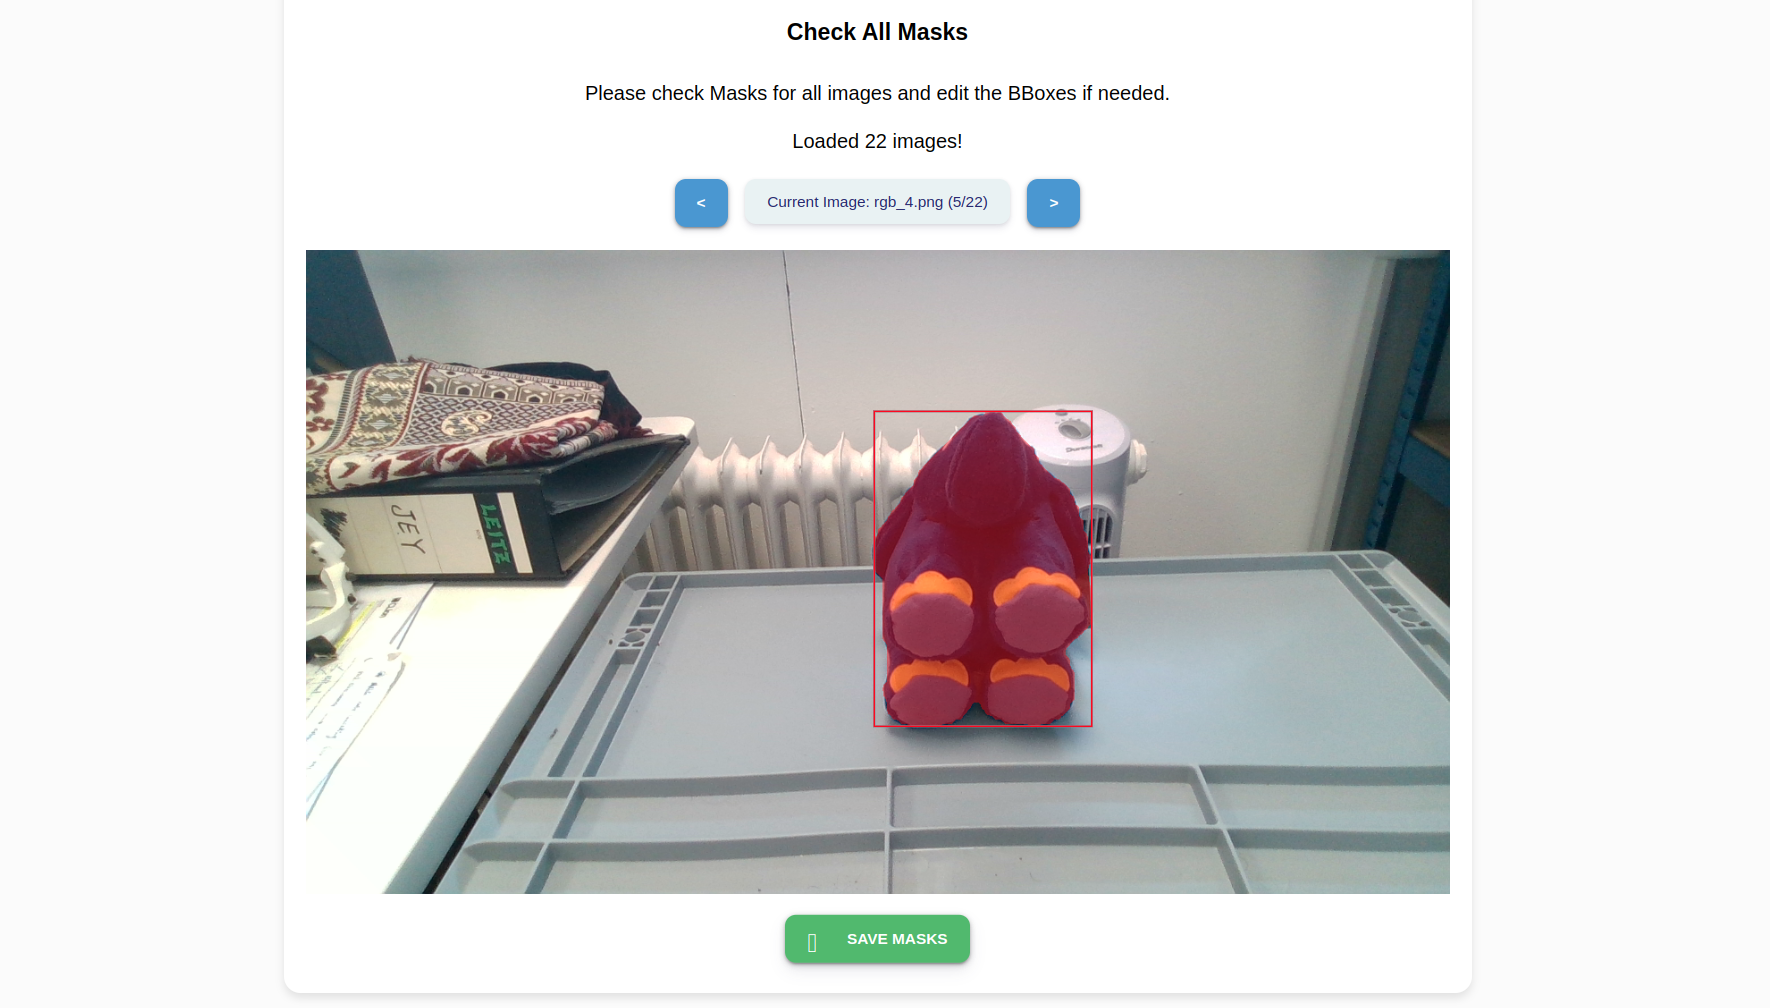
Press Save Masks to save the mask templates. Click on the Home icon to return to the front page of the wizard.
Step 2: Train a model from the generated masks and test
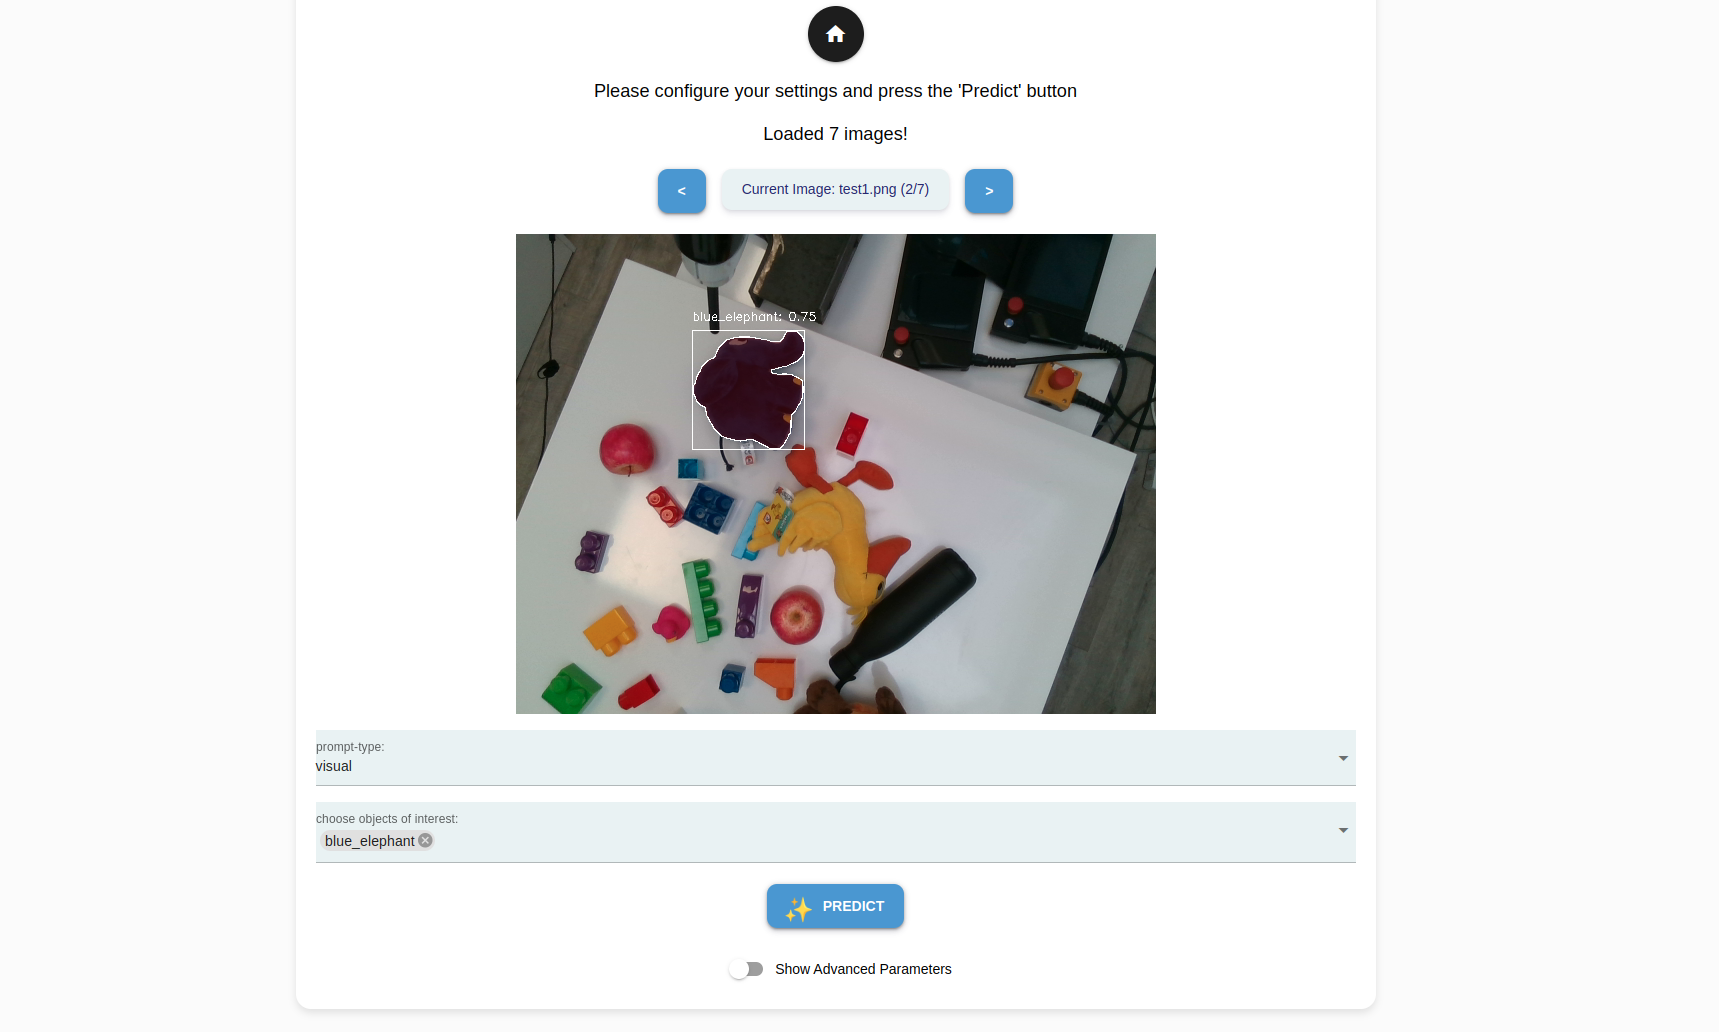
Click Inference to create a model from the generated masks and also to perform a sample inference. Select Load Images to select the images from the file system to make a sample inference. Click OK.

Tip
You could use an image from the object_templates/<your object folder>. If you would like to test the model on an unseen image captured using an external camera, save the image in a USB and use the Robot Mode’s File Manager utility to transfer the image to object_perception/objects/test_images.
For each image your have selected, you can choose from the following prompt types to experiment and evaluate their performance.
Prompt Type |
Description |
|---|---|
Visual |
Primary detection mode for neura_DLIS2 method. Detects only the selected, onboarded objects. |
Everything |
Detects all objects in the image. |
Text |
Detects all objects, which attributes that matches the input prompt the closest. |

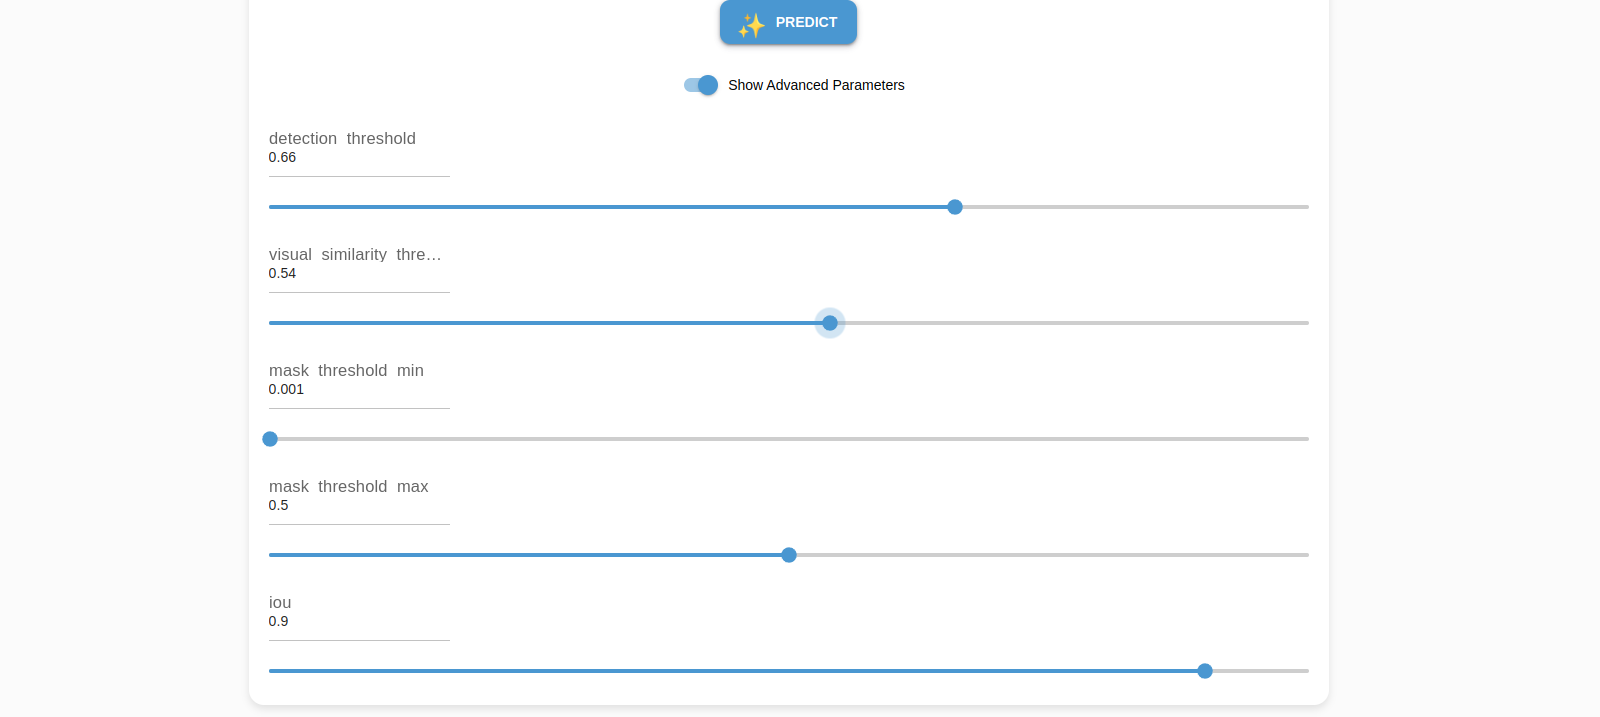
There are also several
Advanced parametersthat can be shown and configured.
Parameter |
Description |
|---|---|
detection threshold |
The confidence score required for an object to be considered detected. A higher threshold means only high-confidence detections are retained, while a lower threshold allows more potential detections, including uncertain ones. |
visual similarity threshold |
Determines how closely a detected object must match a reference object in terms of appearance. A high threshold ensures only highly similar objects are detected, while a lower threshold allows more variation. |
mask threshold min |
The minimum threshold for a pixel to be considered part of the detected object’s segmentation mask. A higher value results in a stricter, more refined mask, while a lower value captures more surrounding pixels. |
mask threshold max |
The upper limit for the mask threshold, ensuring that pixels beyond a certain confidence level are included in the object’s segmentation. |
iou |
A metric measuring the overlap between the predicted bounding box (or mask) and the ground truth. A higher IoU means stricter matching, ensuring detected objects closely align with their actual shapes. |
After specifying the inference parameters for every image, click Predict. The first time a new or updated model is loaded, it may take a few extra seconds to complete. Subsequent predictions take an average of ~0.5 seconds.
Note
If the inference results are not satisfactory, tune the Advanced Parameters